|
|
|
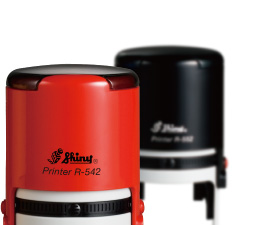
Simple yet functional, Shiny Printer Line's firm structure and durable materials enables smooth movement and easy handling. Special designed patent-pending rubber band cover protects the stamp from being inked after long use. Also keeping fingers clean when adjusting rubber bands.
Various sizes of Date Printer are also available.
|
|
|
|
|
|
|
|
|
|
|
 |
|
|
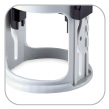
Full Size Display Window
Designed to allow the users to pick up the required stamps easily. |
|
 |
|
|
Lock Button
The lock ensures easy and safe operation for the users. |
|
|
|
|
|
|
|
|
|
|
|
 |
|
|
Excellent Impression
Top quality replaceable inkpad provides clean and neat impressions. |
|
 |
|
|
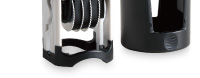
Solid Construction
Made only with the best quality materials and latest technologies guarantees durability and smooth movement. |
|
|
|
|
|
|
|
|
|
 |
|
|
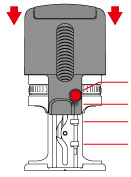
PUSH
|
 |
|
|
|
|
|
|
|
|
|
1. Depress the stamp to the first lock position to insert or to take out the ink pad. |
|
2. Gently depress the handle to return the
stamp to its normal position. |
|
|
|
|
|
|
|
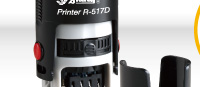
R-517D
|
|
Bottom Cover is included in R-517D |
|
|
|
 |
 |
 |
 |
 |
 |
 |
 |
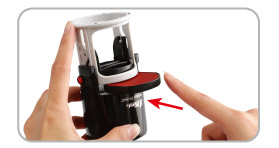
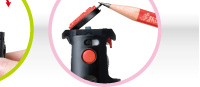
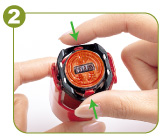
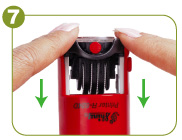
Press the red clip to release die plate for date adjustment. |
|
|
|
 |
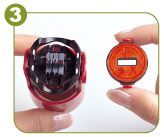
Use an object to push back the die plate. |
|
|
|
|
|
|
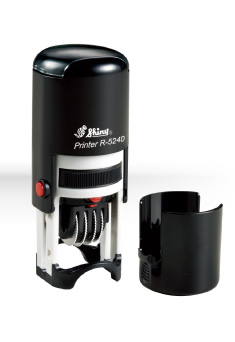
R-524D
|
|
Bottom Cover is included in R-524D |
|
|
|
|
|
 |
 |
 |
|
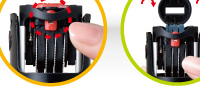
Secure the third lock to remove the die and adjust the date band. |
|
|
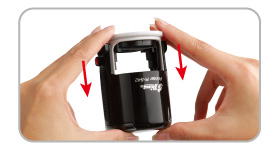
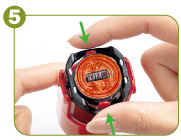
Press the two red buttons on both sides at the same time to remove the die. |
|
 |
 |
|
Note that date bands can only be adjusted after the die is removed from the band housing. |
|
|
|
|
|
 |
 |
 |
|
|
|
|
Again, press the red buttons to replace the die in band housing. |
|
|
Ensure the die is secured in the band housing. |
|
|
|
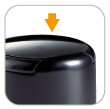
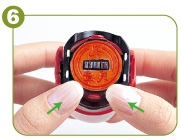
Press down on the fram with both hands to release the lock. |
|
|
|
|
|
|
|